What Is Time Tracking in Jira?
Time tracking in Jira is a feature that allows teams to log, estimate, and report time spent on issues and projects. It helps teams monitor progress, create efficient workflow, and improve project and resource planning.
If you are familiar with Jira to any degree, you are probably aware that this project management tool is mostly used to track time spent working on the project or its particular tasks in agile project management. As such, Jira time tracking apps are commonly used to track time in smaller teams and companies.
What Jira Time Tracking Can Be Used For?
Most users only use Jira time tracking to keep track of the hours they spend on the projects in their weekly Kanban board, as the tool lacks advanced time tracking functionality and mostly focuses on project-level insights. Still, Jira has more to offer than it meets the eye.
Jira features can be used for:
- Accurate time tracking in small teams and simple projects,
- Monitoring the time spent by the employees on particular tasks or projects,
- Generating basic timesheets,
- Visualizing time spent on the projects and tasks.
Pros and Cons of Jira Time Tracking
As you probably suspect after reading the list above, Jira has some time tracking features you may find useful, but there are some things missing from the picture. If you thought so, you are certainly right – Jira has its upsides, but also has some downsides.
Advantages of Time Tracking Function in Jira
Jira’s pros include:
- Advanced time tracking for individual employees,
- Progress bar in a task window,
- The ability to generate Jira timesheets,
- It’s a lightweight and adaptable solution with many integrations – including the one with BigTime.
Distadvantages of Time Tracking Function in Jira
However, the list of features missing from Jira time tracking tools is much longer. It includes:
- The lack of time-offs / absences / public holidays,
- Lack of time tracking reports for the entire project or all the operations,
- The realistic estimates are only available for individual tasks; project portfolio management in Jira does not calculate estimates for the entriety of the project,
- Lack of financial information on wages, budgets, and no option to create customer invoices,
- Complicated interface from employee’s point of view,
- Very limited reporting,
- No capacity-based resource management,
- No advanced time tracking permissions section with customizable access levels,
As you can see from the summarision above, Jira’s abilities are limited – that is why this time tracker mostly used for small teams and their project managers.

Let’s take a closer look at how Jira time tracking works.
Jira Issue Time Tracking or Task Time Tracking
Logging time on an issue (also known as a task) is one of the basic actions an average user can perform to track their time in Jira. While the process is really simple, it requires some preparation to be available to the specialists and other managers alike.
Preparing an Issue or a Task
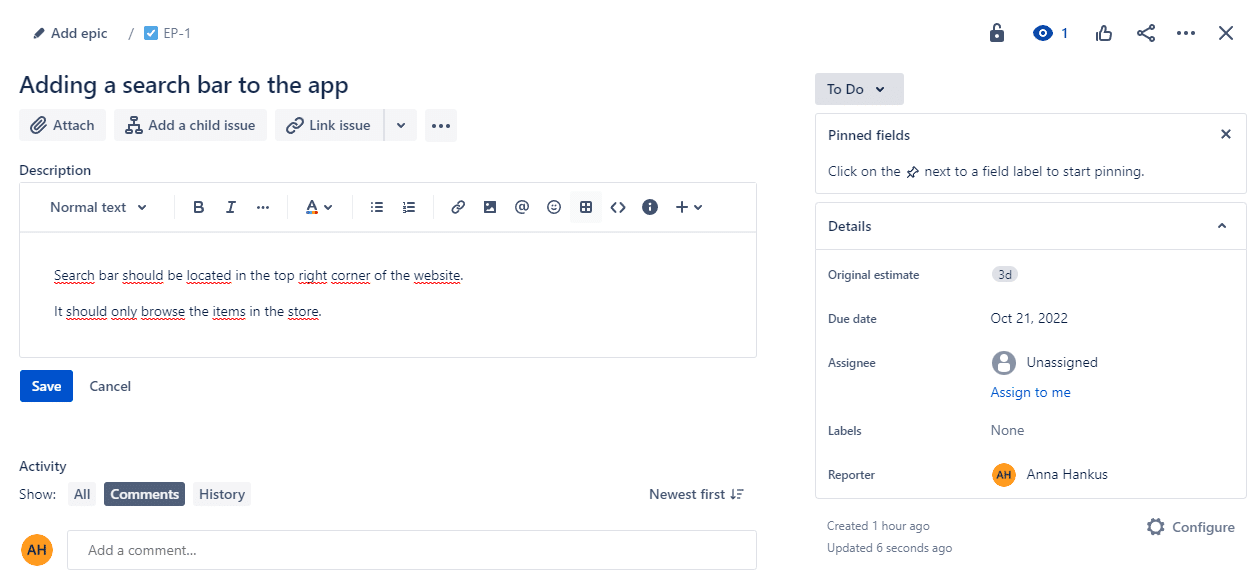
Before you begin time tracking in Jira, you need to define what you or your team are actually going to work on. To do that, you need to create an issue in Jira.
To do that, first you need to estimate the issue and set milestones for the task. Start with choosing accurate delivery estimates and set the final delivery date. Then, select the issue and create Story Points and Original Estimate (or custom estimate, should you need one) that match your project requirements. Do that using weeks (w), days (d), hours (h), and minutes (m).

The data can later be used to improve your Jira task time tracking – it is common to compare the original and current time estimates for issues in the current project.
Logging Time on an Issue or a Task
Once your task or a subtask is already created, you and your team members can start assigning Jira time tracking to the specific issue. There are a few ways to do that.
First, you can track time in Jira from the view of your Kanban board. Simply click on a day you want to report your work for and use the search bar in a pop up to find a task you have been working on. For the best result, enter the task ID into the search bar.
Alternatively, you can also use the dynamic time tracking from the work view. Find the issue you have been working on and select the button Log work. Then, fill in the details of your work (i.e. dates, ltime and description) and confirm. The task will appear in your worklog right away.
Editing the Time Tracked on an Issue
Sometimes we simply forget to add some details, or the time on an issue that was already logged has changed. Other times, we need to add more details to past entries and work logs. In that case, you may want to edit the issue you had entered into Jira time tracking tools before.
To do that, simply open your worklog and select a previously reported issue. You will see a pop-up window with the same details you would fill while logging a brand new task. Simply edit the details in the field and confirm the changes in the bottom right corner of the window.
Jira Project Time Tracking
Jira task time tracking is simple – but what if we want to report on more just than an individual task?
How to Enable Time Tracking in Jira?
To start gathering data on hours spent working on a project, you first need to activate the option.
To make time tracking accessible for everyone:
Go to Jira Settings:
- Click on the Gear Icon ⚙ in the top-right corner.
- Select Issues.
- In the left menu, scroll down to Time Tracking (under Issue Features).
Configure time tracker settings.
Enable Logging Work (If Not Already Enabled):
- Navigate to Field Configurations under Issues.
- Ensure the Log Work field is available in issue screens to grant users the access to tracking work and editing their existing data.
Configure Time Tracking in Jira: Global Settings
After creating a project, you may also select the global settings for Jira project time tracking.
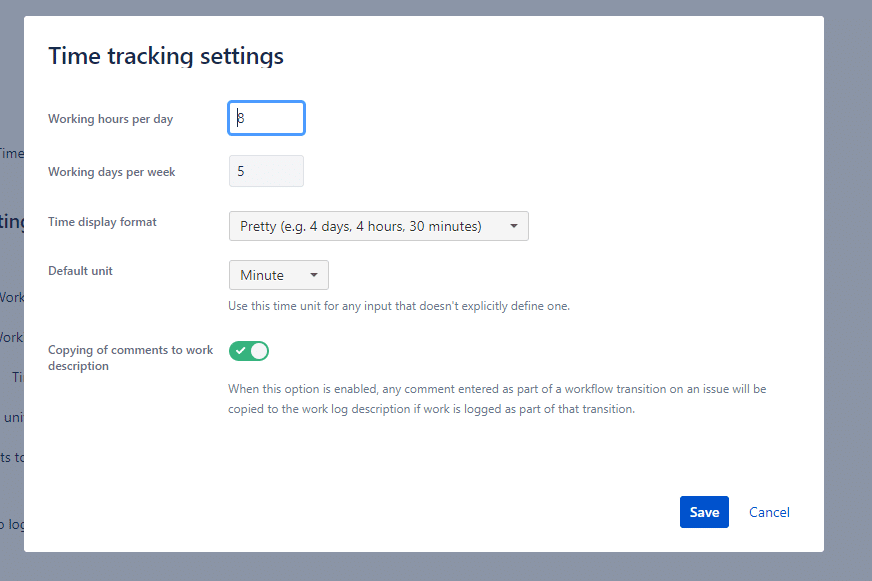
To do so, go to the Administrator panel in the top right corner and select Issues. Then, on the sidebar, under Issues Features, select Time Tracking and Edit global settings.

In this window, you can set:
- The number of working hours in a day,
- The number of working days in a week,
- Time display format,
- Default time unit (day, hour or minute),
- The option to allow copying work description for the same task.
Then, save the details and start resource planning!
Managing Permissions in Jira Time Tracker
Before the first work logs appear in your projects, you need to ensure that your team members have the right permissions to track time and that managers secured work logs properly. To control who can log, edit, or delete time entries in Jira, you need to configure Time Tracking Permissions at the project level.
To allow your team members to track time, you can easily manage another set of Jira settings. To do that:
Access Jira Permission Settings
- Click the Gear Icon ⚙ (top-right corner).
- Select Issues (for global settings) or Project Settings (for project-specific settings).
- Navigate to Permissions.’
Grant or Modify Permissions
- In the Permissions page, scroll to the Time Tracking Permissions section.
- Click Edit Permissions.
- Assign permissions to roles, groups, or individual users.
- Save changes.
Key Time Tracking Permissions & How to Configure Them
| Permission | What It Does | Who Should Have It? |
| Work on Issues | Allows users to log work and track time spent on tasks. | Developers, team members. |
| Edit Own Worklogs | Allows users to modify their own logged time. | Team members. |
| Edit All Worklogs | Allows users to edit others’ work logs and log time on their own. | Managers, project leads. |
| Delete Own Worklogs | Allows users to delete their own time entries. | Team members (if needed). |
| Delete All Worklogs | Allows users to delete any time entry. | Project admins, managers. |
How to Create Jira Time Tracking Report?
Jira provides a default Time Tracking Report that shows time estimates, time spent, and remaining time. It’s based on the information from Jira’s native time tracking work logs submitted by every team member.
To create time tracking report in Jira:
Navigate to Reports:
- In Jira Software, go to the Project you want to track.
- Click on Reports (left sidebar).
- Select Time Tracking Report under the Agile or Classic reports section.
Configure The Report
- Choose the desired Project.
- Select a Fix Version (if applicable).
- Select a Sorting Method (by project, component, assignee, etc.).
- Click Next.The report will show estimates vs. actual logged time for issues.
Still, this Jira time tracking report only provides basic information on the team’s performance and it should not be used to create more efficient workflow, since it doesn’t point to the root cause of particular issues. Such an in-depth approach can only be achieved with Jira time tracking plugins or more advanced tools combining finances with resources – such as BigTime Foresight.
How to Disable Time Tracking in Jira?
If you no longer need time tracking in Jira, you can disable it in the settings. To do that:
- Go to Jira Settings. Select Issues. Click on the Gear Icon ⚙ in the top-right corner.
- Find the Time Tracking Settings. In the left sidebar, scroll down to Time Tracking (under Issue Features).
- Turn Off Time Tracking. Click the Deactivate button.
- Confirm Deactivation. Jira will stop displaying time tracking fields and work logs. Logged time will not be deleted but will be hidden from view.
What Happens After Disabling Time Tracking?
- Users won’t see time tracking fields in issues.
- Logging work will no longer be available.
- Existing work logs remain stored but are hidden.
- Can be re-enabled anytime by clicking Activate.
What If Jira Time Tracking Doesn’t Suit Me?
As you can see from the list above, Jira time tracking contains a few basic time tracking features you may use to monitor your projects. Fortunately for such demanding users, Jira has numerous integrations that allow you to connect the software with nearly any other tool you may find more fitting for time tracking.
What features are not included in Jira time tracking software?
Time tracking in Jira is very simple: it only contains projects with tasks and subtasks, along with time constraints and other general details.
However, Jira lacks a more general approach to the subject. The tool does not contain:
- Calendar with drag-and-drop Gantt chart showing responsibilities of both particular employee and the entire team,
- Skill management,
- Jira resource management
- Advanced reports,
- Information on wages and project budgeting.
Jira vs dedicated tools: which time tracking is better?
Jira time tracking may be enough for teams and their project managers who work at individual operations. However, some tools can offer more than just the basics. Let’s see how Jira compares to one of them – we will use the example of BigTime Foresight.

Jira has:
- Advanced time tracking for individual employees,
- Progress bar in a task window,
- The ability to generate timesheets for a project,
- Task management,
- Roadmaps for individual projects.
On the other hand, BigTime Foresight has:
- Advanced time tracking for people, projects and teams, suitable for agile processes,
- Comprehensive timesheet reports with budgeting,
- Project, stage and workload management,
- Complete project portfolio management feature,
- Resource and skill management with capacity calculations
- Wages and project accounting,
- Time offs with requests,
- Advanced reports in form of charts, summaries and well structured table.
What Can You Get From Integrating Jira with BigTime Foresight?
BigTime Foresight is a comprehensive project portfolio management tool that can offer you every feature you need to succeed in your service-based business.
Apart from all the features missing from Jira time tracking, BigTime Foresight also offers:
- Information on leaves, absences and public holidays that need to be included in the project schedule,
- Comprehensive budgeting based on information on wages and tracked hours, as well as project finances (incomes, overheads, etc.),
- Smart drag and drop allocation with a search bar that can help project managers to look for the right person for the job and manage resource allocation,
- Automatically calculated capacity for team members (absences and holidays included),
- Advanced and customizable reports on key indicators, including benches, overtimes and overbooking,
- Skill management feature with information on experience, skills and certifications of employees,
- A comprehensive overlook of all the projects and people involved in them,
- Alerts and notifications for key issues, incl. overbooking.
Try out our solution right now or let us show you how to make the most of it in a personalized demo.


